
Last Christmas a dear friend of mine asked her husband for a Design Plan from Reclaiming Home as her gift. She wanted to makeover their basement family room, since it had not been done since the house was built. I have spent a lot of hours hanging out with these wonderful people in this room, and I was excited to be a part of it. In January I presented their design plan, over the course of 10 months they renovated it, and a few weeks ago I got to go in and style it and put the finishing touches on it. It is so gorgeous and I am so happy with the way it turned out. I hope you enjoy the before and after pictures as much as I do!
Let’s start with the major changes in this room. My friends ripped up the vintage carpet and replaced it with Luxury Vinyl Tile (LVT), they scraped the popcorn ceilings, painted, updated the fireplace, and made barn door window coverings. However, they kept the main furniture in this part of the space. Fun fact: my husband LOVES these couches. Whenever we visit with these friends, he sneaks downstairs and falls asleep on them.
Fireplace Update
The fireplace turned out so beautifully. When I met with my friends for the original design consult, we talked quite a bit about what to do with this particular feature. One person wanted to paint the brick to lighten up the space, the other didn’t want to touch the brick at all. So, I came up with this design as a compromise.
By adding simple moulding to frame out the brick, adding more moulding and some panelling above the fireplace, and painting all of the trimwork a bright white, we transformed this fireplace without painting the brick. It now feels bright, updated, and more substantial in the space. This was quite a simple project for even a beginner handyperson, and it cost just a few hundred dollars. When you walk into the room the fireplace is now the main focal point, and it sets the tone for the rest of the space.
The new light grey paint on the walls really helps to brighten the room, and placing the TV on this wall makes it viewable but not in competition with the fireplace for the spotlight. The TV is on a wall mount that can swivel, so it’s comfortable for watching TV from any piece of furniture in the room. Changing out the TV stand for a nice white cabinet made everything feel cleaner and prettier.
Window Coverings
When I created the Design Plan for this basement makeover, I suggested getting Roman blinds for window coverings. After I presented the plan, my friends asked about doing barn door window coverings instead. This idea actually solved several problems in the room. First, it took away the question of what to do with the ledge on this wall. I have the same ledge in my basement halfway up the wall, and while in theory it might be a good idea, it can be really awkward in reality. Having these doors fill up the empty space makes the ledge disappear. It also solved the problem of what to hang on this wall. We couldn’t hang floor length curtains because of said ledge, and the wall would feel empty with nothing on it at all. This was a really good solution to all of those issues.
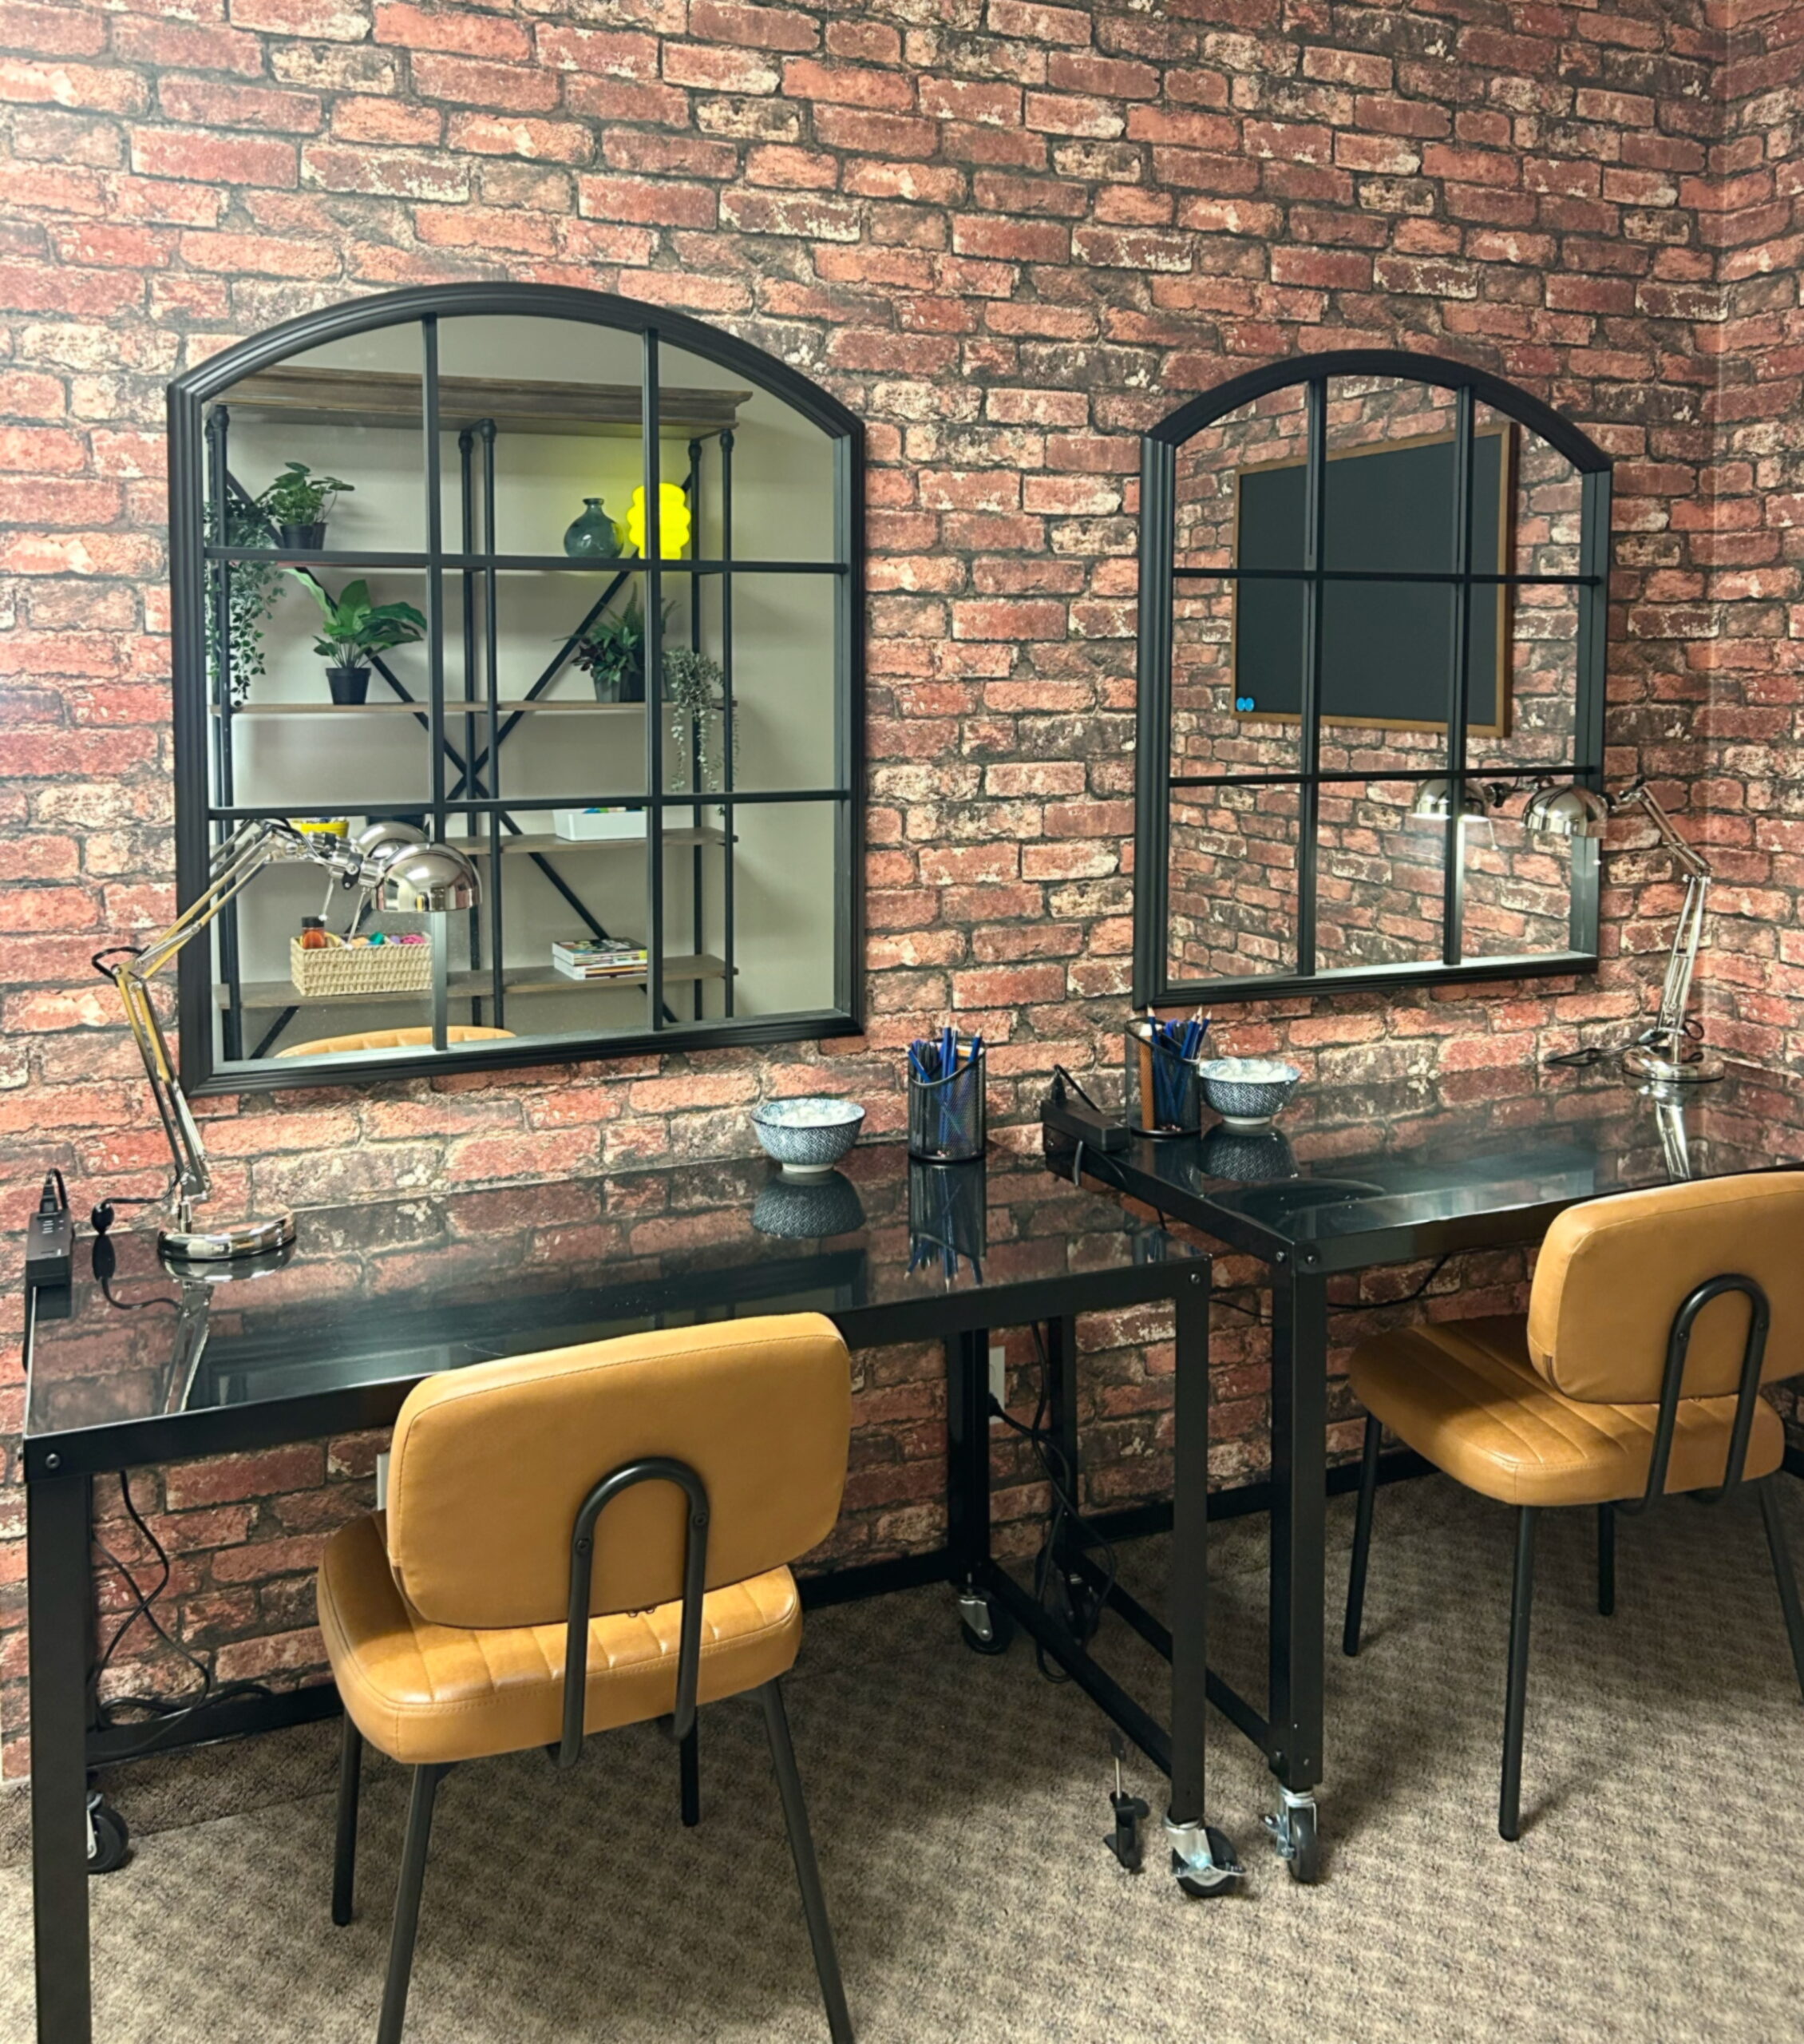
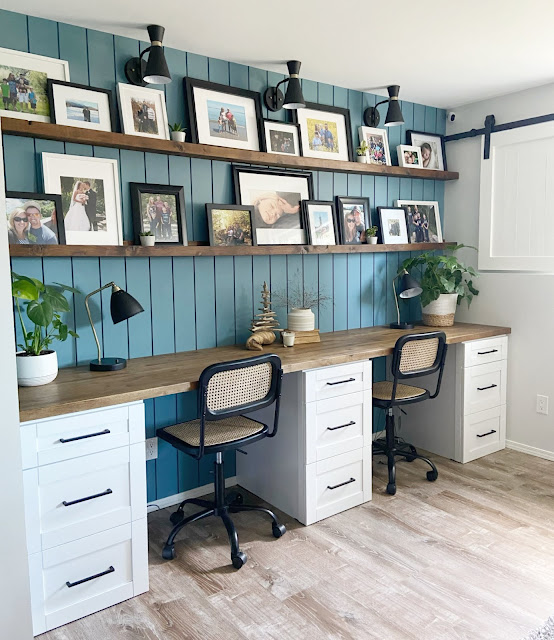
Built-In Desk Area
Y’all, can you even believe this transformation?! One of the requirements we discussed for this basement makeover was a desk/work area with storage. My immediate thought was a built-in desk. This area literally has a little niche that was just calling out for this design! I knew my friends could handle this DIY too, because they are super handy. I just LOVE the way it turned out. This area was heavily inspired by the female half of this couple. She loves this shade of blue. We actually refer to it as Colleen-blue when we are out in the world. Another thing she loves is taking photos of her family. I knew that if we put long picture ledges over the desk she could proudly display them there, and it would be possible to easily switch out pictures and play with new frames in the future.
They used kitchen cabinets and butcher block for the desk, with clean black hardware. I love the way it looks against the blue. I found these amazing desk chairs at HomeSense. We needed the perfect combination: chairs that would sit at the right height, be small enough to fit in each desk space, be comfortable and pretty, and also not cost a million dollars. Desk chairs can be really expensive! I was shopping for another client when I saw these at HomeSense. I literally gasped and grabbed them and wheeled them to the front immediately so that no one else could have them! They were under $150.00 each.

The last item that finishes this area is the wall sconces. There is no wiring on this wall, so we did the puck light trick. They turn on and off with a remote and highlight my friend’s beautiful photography so well. And I love the vertical shiplap on the wall! It ties in with the fireplace beautifully.

We brought the blue into the living area with pillows and textiles. The gold lamps really make the room feel extra cozy at night. I know I have said this before (and I will say it again!), but table lamps make an enormous difference in the look and feel of the living space.
My friends are really happy with their new space, and I just love the way it turned out. What is your favourite part of this basement makeover? I can’t choose between the fireplace makeover and the new built-in desk area! Do you have a room in your house that needs help? A design plan could be your solution. Contact me today to discuss options!
PIN IT!