This main living room/dining room project was a big one and included a complete transformation. We changed out flooring and light fixtures, added wall treatments, built-ins, painted the walls, built floating shelves and furniture, transformed the fireplace, and redecorated using what my client already owned and a few new pieces. This client, who has become a dear friend, created my new amazing website where you’re reading this post and in exchange I renovated and redesigned her space.
Halfway through the project my good friend and work partner Scott Ptolemy of Solid Renovations came in for a couple of weeks and helped me with painting, flooring part of the stairway, installing baseboards, covering up a glass block wall, putting transition strips in the doorways, and building in the TV stands. This space has been reclaimed indeed! Let me take you through this giant project step by step.
Layout Changes
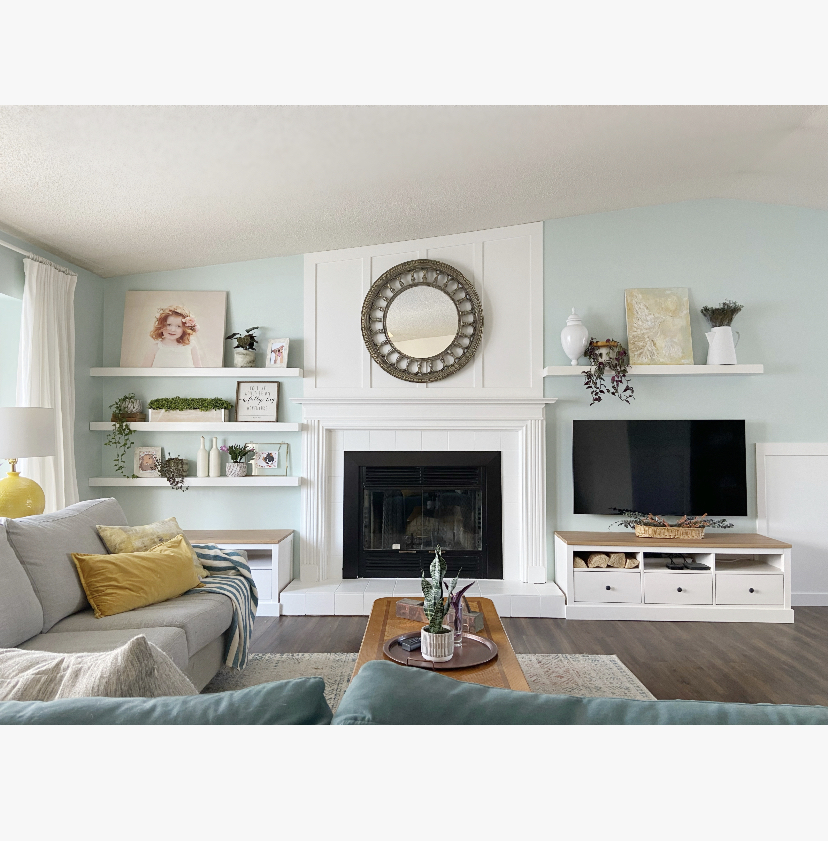
So much changed in this room, but one of the most impactful changes was the focal point of the room. Before the renovations started, the floor plan cut the living room in half. Because of the furniture placement, the living room stopped at the edge of the fireplace and the main focal point was the TV in the corner. This created a large section in between the living room and dining room that didn’t have a real purpose. In my design plan I extended the living room past the fireplace, and made the focal point the newly reclaimed fireplace (which we will get to!). The TV is now on a swivel wall mount so when the family is watching TV it’s just as comfortable as it was before the renovations.


Before the renovations all the furniture was pushed right up against the window. As part of the layout change we pulled the living room furniture out from the window. This allowed for new curtains that have more height and let in a lot more natural light.


This whole design is a mixture of brand new, repurposed existing pieces and elements, and thrifted finds. The couches, rug, pillows and throws were new. The coffee table, end table, and dining room set my friend already owned, and almost all of the decor was thrifted or repurposed.

Fireplace Changes
The fireplace wall was one of the biggest transformations. This is the same fireplace as before, but we transformed it using lots of paint and trim. The benches are from IKEA, and we added trim to them to make them built-in. I made the floating shelves so that we could get the exact size we needed. Doing custom built-ins were outside the budget of this project but we created a very similar feeling within their budget using this IKEA hack idea and building floating shelves.


Wall Treatments
Changing the flooring and wall colour made a huge difference. We used board and batten to make the dining room distinct. The combination of a beautiful light green/blue and white on the walls really brightened the room. My friend really wanted a pretty mint colour, and it’s a really hard colour to pull off. If you go into a paint store and tell them you want mint they almost always try and talk you out of it. When we put the colour on the wall I was really unsure at first because next to the existing wall colour it looked awful. But I just love the way it turned out and so does my friend. It is one of the things people ask me about a lot, so I will just tell you that the colour is Ice Rink from Behr. I think having so much white in the room really makes it feel special and not overwhelming.


Light Fixtures
We also switched out all the light fixtures. Before we got to work the light fixture in the dining room was in a really odd place. I wanted to center the dining room table and light on the new built-ins in the room. So when we purchased the light we made sure the cord was long enough to swing it over to where we wanted it to be. This is a great option if you don’t have the budget to hire an electrician to move the fixture. Having your light in the correct spot can be the difference between a balanced room and one that feels wrong.

Dining Room Built-Ins
When I first saw this niche, I knew it was begging for a built-in. Originally we were going to use IKEA cabinetry to make one, but instead decided to have it custom-built so it was exactly the same size as the space to maximize storage. I built the floating shelves and we styled the whole thing using my client’s things that she already owned. This is one of my favourite parts of this remodel. It gives so much character to the space.

We kept the existing dining room table and chairs because in the newly designed space they fit right in. We removed a lot of the smaller items and art pieces that didn’t work in the space and repurposed them when we could. For example, the antique cabinet is now an entryway cabinet. The new art is a much better scale for the room. Art is so subjective. When I am making a design plan for clients I will suggest art pieces, but I also always tell them to find what makes their heart sing.


My clients had not changed anything in the house since they moved in many years ago, so the style of the house and the decor before we got started didn’t reflect her own style or personality at all. This transformation took over a year, but it was worth it because the end result is a space that feels like my client lives there. When I look at the the after pictures, it just really looks and feels like her style, and her home. There are few things that are more satisfying to me professionally than helping my clients achieve just that.